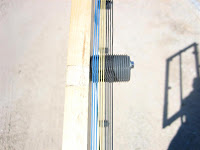
Let's build a passive loop with perfectly spaced coil turns.
One of the problems I've always encountered in constructing passive loops is keeping the coil turns evenly spaced and perfectly parallel to each other. Regardless if you form a loop support in the form of a cross or a square, you must devise a way to space the turns evenly at each corner. Traditionally I would make the support of wood (usually 1 x 2 lumber) and file notches in the corners for the wire to sit into, or pound many tiny nails in a row to hold the wire apart. It's tough to file evenly-spaced notches very close together and tedious to pound a lot of tiny nails.
I tend to use light gauge insulated, solid copper wire for my loops. Stripped-out four conductor telephone wire is cheap and easy, usually running about 24 gauge. It's nice and light, flexible, and holds its shape. Have a walk around a hardware store and you will find many other items that might be used in the construction of antenna devices. One day, I came across some short plastic pipe nipples, generally used in sprinkling system work. These were 3/4 inch pipe size (3/4 inside diameter) and 1.5 inches long. They are threaded the entire way across, with thread spacing at 14 threads per inch (0.0714") apart - perfect thread spacing for this sized wire. The thread notch is just deep enough to accommodate most small sized wire. It would be difficult to file notches or drive tiny nails this precisely together. 1/2 inch diameter pipe nipples could also be used, as the thread spacing is the same.
I built a square frame for this loop, 24 inches on a side, again out of 1 x 2 inch wood, commonly called "furring strip". At each corner and at the center of each side I screwed a 2 inch screw (8 screws total) to hang the plastic pipe nipples on. One could probably use wooden pegs to avoid the metal screws being near the loop wires, but I have not found it a problem as it's a small amount of metal, and at 90 degrees to the wires. I placed a plastic nipple on each screw. The screws don't actually fasten the nipples down, but the nipples sort of pivot on each screw and move with the wire, settling where they need and taking up the wire tension. Use a screw with a wide enough head to capture the nipple so it doesn't slip off the screw.
The loop requires about 90 feet of wire, 11 full turns in all. I mounted a 365pf variable capacitor for tuning near one corner. Drive two very small nails into the frame at the same corner as the variable capacitor to secure the start and end of the coil. Fasten the wire to start and begin winding the loop, making sure the wire sits into each nipple thread from the thread closest to the frame and working towards the outside. Run the last leg of the final coil turn back to the ending nail and fasten there. Solder the start and end of the loop to the capacitor. Install a knob on the capacitor and you are done. This loop tunes precisely between 530 KHz and 1700 KHz.
PVC could be adapted to use as a frame, and I considered this before using the wood. A 3-legged, 3/4 inch PVC corner tee is available which has a female pipe thread at the center leg. The nipples would be screwed into this leg of each tee to form the corners of the loop like we did with the wooden frame. A PVC frame would be totally portable, as it could be disassembled very easily.
I find a loop with perfectly spaced turns to have sharper nulls and more precise (sharper) tuning. Try this loop sometime.


No comments:
Post a Comment